1、驱动相机1
驱动HAP雷达,在ros2且驱动已安装完成的前提下,需找到雷达驱动文件夹所在路径
cd ws_livox/
source install.setup.sh
ros2 launch livox_ros_driver2 rviz_HAP_launch.py
驱动相机,,install文件夹下gscam_launch.py用于修改相机IP地址
cd ..
cd gscam2/
source install/setup.sh
ros2 launch gscam gscam.launch.py
通过设置雷达rviz中add添加,by topic→image→rviz
2、驱动相机2
rviz不显示点云信息,优先考虑IP错误。首先去install下找到对应雷达的config文件,确认IP并ping,若不通考虑IP更改,继而选择wireshark确认具体雷达IP地址。
3、相机内参标定
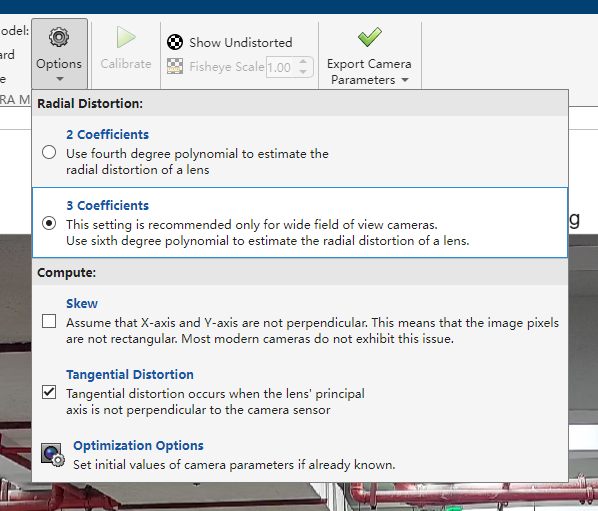
打开matlab,在APP中选择camera calibrator进行相机内参标定,add image→全选→ checkboard→10 centimeters→high distortion,图片加载后,options中选择径向/切向畸变参数,运用calibrate标定,选择0.5像素过滤标定欠佳的样本,确保标定准确性,然后右键图片remove后recalibrate导出结果,参数记录如下:
hap_108:
K(内参矩阵):
1899.24967024670	0	768.656828652617
0	1900.61788976051	746.700334371105
0	0	1
RadialDistortion:
-0.506708329891789	0.467699987533127	-0.229441405461722
TangentialDistortion:
-0.00623623263379616	0.0295804821563305

hap_109:
K:
845.849222437139	0	1003.51563616131
0	852.608526715961	529.769860782243
0	0	1
RadialDistortion:
-0.189761242266482	1.79778794802367	-9.05000176192234
TangentialDistortion:
-0.00160958318653854	0.00674973655509358

mid360_110:
K:
978.498593222687	0	987.570866343477
0	980.586951636292	605.483743148585
0	0	1
RadialDistortion:
-0.395753007325228	0.204068967720898	-0.0451851173756056
TangentialDistortion:
-0.00902874776801826	-0.00259830272335367

mid360_111:
K:
691.680309232192	0	1019.86001054515
0	695.122253531840	546.904367226709
0	0	1
RadialDistortion:
-0.158160613526436	0.142083916816886	-0.0783391303771136
TangentialDistortion:
-0.00866140051248155	-0.000815544578287927

mid360_112:
K:
1061.14411799045	0	998.515714368880
0	1066.19291665375	588.891679703296
0	0	1
RadialDistortion:
-0.521237350173838	0.513365511267123	-0.412836662037985
TangentialDistortion:
-0.00764717738231407	-0.00976679621905015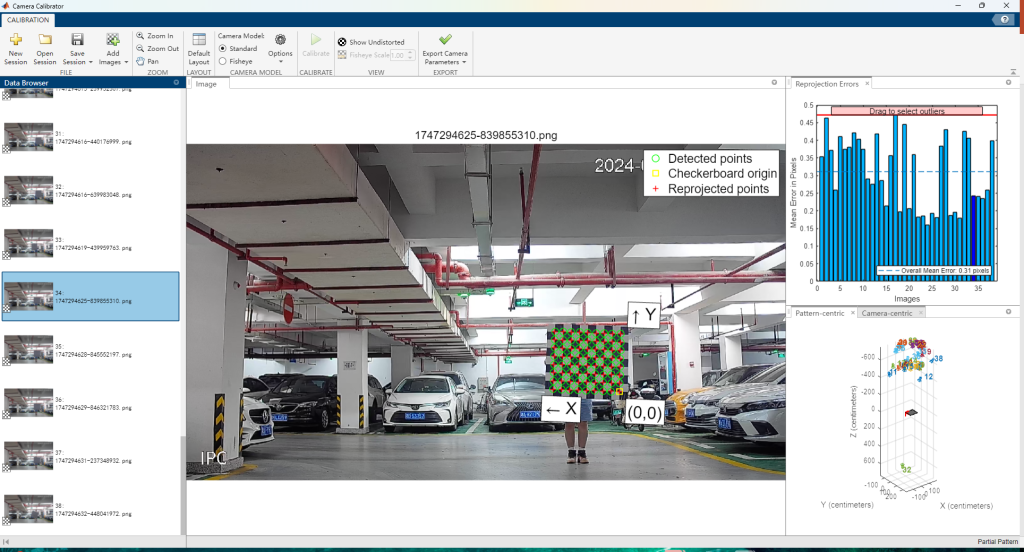


使用openclib进行标定,选择两张图片以及其对应点云,使用matlab标定的参数,在center_camera-intrinsic.json文件中进行参数修改,如下所示:
{
    "center_camera-intrinsic": {
        "sensor_name": "center_camera",
        "target_sensor_name": "center_camera",
        "device_type": "camera",
        "param_type": "intrinsic",
        "param": {
            "img_dist_w": 1920,
            "img_dist_h": 1080,
            "cam_K": {
                "rows": 3,
                "cols": 3,
                "type": 6,
                "continuous": true,
                "data": [
                    [
                        1899.24967024670,
                        0,
                        768.656828652617
                    ],
                    [
                        0,
                        1900.61788976051,
                        746.700334371105
                    ],
                    [
                        0,
                        0,
                        1
                    ]
                ]
            },
            "cam_dist": {
                "rows": 1,
                "cols": 4,
                "type": 6,
                "continuous": true,
                "data": [
                  [
                        -0.506708329891789,
                        0.467699987533127,
                        -0.00623623263379616,
                        0.0295804821563305,
                        -0.229441405461722
                    ]
                ]
            }
        }
    }
}
需要在/home/cc/SensorsCalibration-master-lidar2camera/lidar2camera/manual_calib文件夹下运行下述代码:
./bin/run_lidar2camera data/hap108_01.png data/hap108_01.pcd data/center_camera-intrinsic.json data/top_center_lidar-to-center_camera-extrinsic.json通过readme进行openclib手动操作,如下所示:
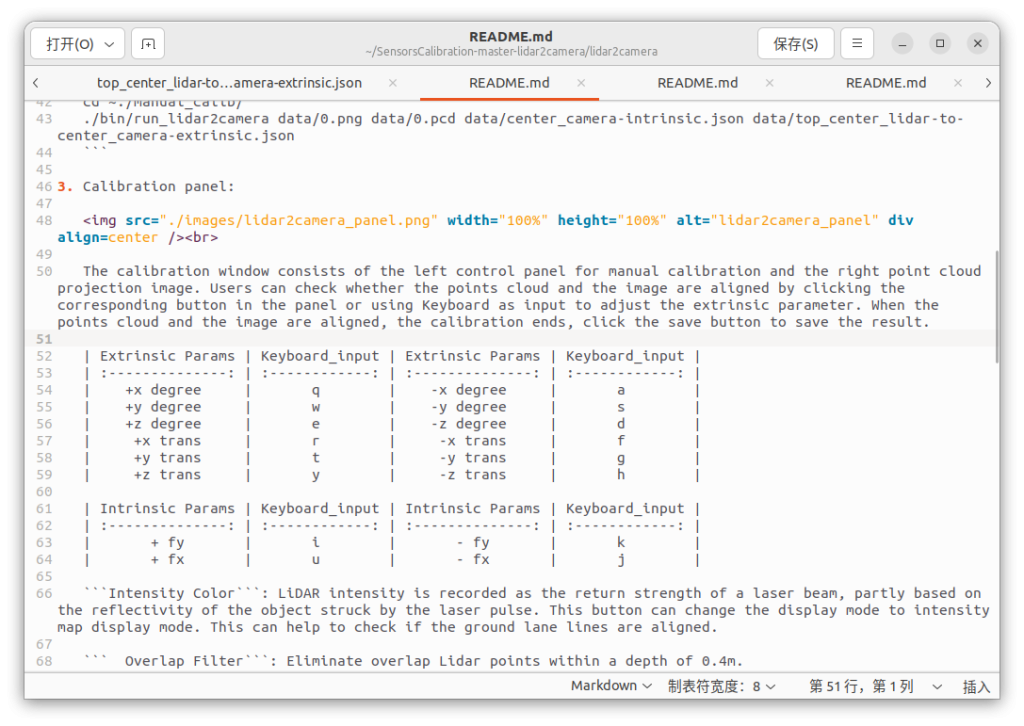
最后得到如下所示的外参矩阵:
hap_108:
0.0796043  -0.996661 -0.0181279 -0.0634501
-0.0179795   0.016747  -0.999698    0.12828
  0.996665  0.0799063 -0.0165864  0.0646923
         0          0          0          1
mid360_111:
   0.98676   0.076317  -0.143105  -0.224061
 -0.145393  0.0252938  -0.989051 -0.0834699
-0.0718618   0.996763  0.0360549    1.11061
         0          0          0          1